A sample text widgetEtiam pulvinar consectetur dolor sed malesuada. Ut convallis euismod dolor nec pretium. Nunc ut tristique massa. Nam sodales mi vitae dolor ullamcorper et vulputate enim accumsan. Morbi orci magna, tincidunt vitae molestie nec, molestie at mi. Nulla nulla lorem, suscipit in posuere in, interdum non magna. | 
So I think this is one of the most brilliant things I’ve ever heard of doing. Some of the most precious drawings on earth appear right when your kiddo learns to draw stick figures. So why not have them draw on something useful or something that will be around forever, and then stitch over the drawing? 
Simon actually drew this about a year ago, but I decided – even though it is an ‘old’ craft I wanted to post it to hopefully inspire you to do this very same thing with your precious art memories. Simon drew every member of our family on this canvas bag in pencil and I stitched over the top of it with variegated thread. I used my sewing machine, of course you wouldn’t have to do that, but it really made the process more speedy. I love how the eyes and smile connect, just as they do in real life. If I had it to do all over again I don’t know that I would suggest pencil as the medium, but you don’t want to use something darker that could show through after the stitching is completed. I used a zig zag stitch and obviously put my stitches pretty close together to cover the pencil. The only problem with pencil was that it wasn’t quite as bold, while stitching, as it could have been. It is hard to see when you are up close and personal, is what I’m trying to say. 
Treasure every moment, they pass much too quickly. I know I know – everyone says this – but it is far too true to be denied. Happy Crafting! Happy Memories! 
In lieu of the approaching wedding…I thought I would share a simple wedding craft. 
Meet Niki – she’s a Ninja! She decided that a sweet wedding favor would be a simple muslin napkin and I couldn’t agree more.  
So the plan was to knock out about 250 of these bad boys and as far as I know – it is done. All I did was stitch a straight stitch around the edges in some form of green thread about 150 times. It was super quick on my speedy machine, nothing fancy, just to prevent fraying. No hemming. No ironing. These napkins are going to look simply beautiful on the outdoor wedding tables at the Moon Randolph Homestead on June 26th. One of the gurus at Selvage Studio (my favorite local fabric store) suggested the simple straight stitch around the edge and that is all that the crafty ladies did.   
One of my favorite humans on earth – brought her stunningly beautiful Singer Sewing Machine – so we would have a couple of machines to work with. How does the saying go – “Something Old…  
Something New…  
Something borrowed… 
And…the rest is yet to come… Happy Wedding and Happy Crafting! 
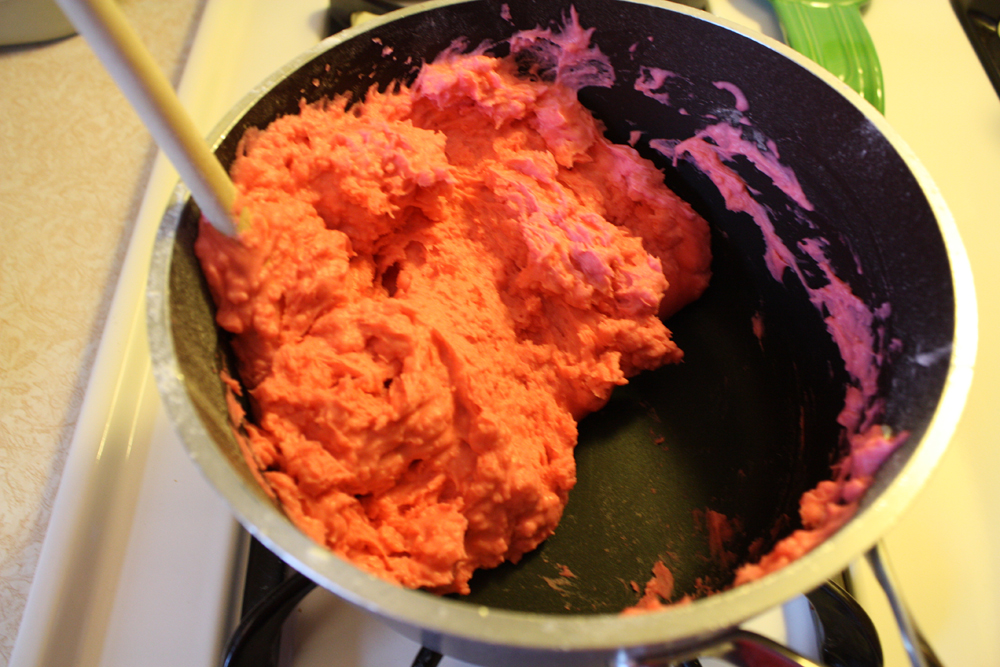
Another rainy day – seems to be the story of our lives these days. Don’t get me wrong it is much needed so I’m loving it! It’ll make our summer less likely to be fire-filled. And – another big plus – it is making our garden grow! It allows us to do all sorts of fun crafty things indoors too and we never tire of that. Turns out we had a rainy playdough day! We’ve got a pretty amazing recipe that we like to follow. There are tons of playdough recipes on line that are wonderful, but this one seems to be our favorite! 

We use 2 cups of white flour (we’ve used wheat before and it works just fine – for vibrant colors white works best). 1/2 cup of salt (sea salt at our house – but it probably doesn’t make much of a difference) 4 tsp cream of tartar 2 cups of water 2 Tbsp oil (veggie or olive) Color (if you want) – even though I hate food coloring of the non-natural variety – I sometimes use it for playdough. It seems to work the best. I also like to add a drop of essential oil to make the dough smell good and I tend to use Thieves oil which is great for killing germs. I knead it in at the end so it doesn’t get heated up.  
You mix the flour, salt and cream of tartar in a medium sized pot – add water, oil and food coloring. Cook and stir over medium heat pretty much constantly. 
The mixture will become more playdough like pretty quickly.   I take it out on the spoon and knead it on the counter from there – a bit of flour on the counter might help prevent sticking. You’ll want to store it in an airtight container to keep it nice and soft! 
 
For some reason this dough is like magic at our house. Gussy and Simon will sculpt for hours! Hours! 
These are some of our favorite play dough tools. 
 
We also have quite the collection of plastic cookie cutters – they came in this quite insane sized set and we like to dump them all out when we play – that very perfect one might be hidden at the bottom of the box. We don’t like to take our chances. 

I’ll leave you with the perfect dough star made by Mister Gussy. Super fun dough-filled day to all of you! 
Happy Crafting!  
I’m featuring another super sweet crafty friend of mine today, and she has so many crafts that I think it impossible to touch on them all. I’m going to share her lovely blog with all of you and you can discover her crafts on your own. And, of course, her etsy shop and if you take the moment to look at any of it, I guarantee you’ll LOVE it! She’s so incredibly talented, I am constantly inspired by her and she takes some pretty incredible photos to share her world with us. She’s a Montana Native and has two sweet little girls Ruby and Margot and she and her husband Andy are both artists. I never even told you her name – Nici! They have a pretty beautiful life together and hearing about it makes me happy. Since this is my craft blog though I suppose I better get to the craft(s).
  
You’ll see many of her creations in her Etsy shop but she makes these adorable appliqued tees that you can personalize with your very own state! She fuses a hand-cut silhouette of the state of your choice and stitches it on to a soft tee shirt. Smart little cookie huh? She uses American Apparel Tees (which are the best in my opinion), all cotton and of course a whole lotta love is included in each lovely garment. Every crafter puts love/soul into their art, at least everyone I know. So…I’ll be brief since Nici is much more eloquent with words than I. Check out her bloggity blog for all kinds of gardening, child rearing, chicken raising, story telling and art loving entertainment. Beware though, you’ll completely fall in love with her family and her life. She’s crafty and I love her. Happy Crafting! 
I just heard about a new social networking Sewing Community – My Sewing Circle – similar to Ravelry (for knitters and crocheters). I have profiles on both of these now so if you want to be my friend mamalovescrafting on My Sewing Circle and mamalovesknitting on Ravelry are my profile names. If any of you are members I’d love to share patterns, etc! You can leave me a comment with your info or find me if you care to do so! Happy Crafting!  
With the rain comes much creativity at our house. I love cozy rainy days. We’ve had a whole pile of them lately so Gussy and I decided we’d make some beanbags the other day when we needed something to entertain us. First – we ate a banana – well I didn’t, I detest bananas, but Gussy ate while we concocted our plan. 
Second we found some scrap fabric – Gus chose his favorites. I just cut the scraps of fabric into 8″ x 5″ pieces. I stitched along the sides, probably should have triple stitched but I just did a single straight stitch. I made sure to leave an opening for the beans.  
Next we dug in our pantry and found some beans (we actually used Lentils) to fill our bags. We flipped the material around so we were filling them right-side-out…not inside-out. We tried to leave a bit of empty space in the bags, so they would be a little bit softer than rocks. We wanted them to be a good inside toy…no broken windows on a rainy chilly day.   
After our bags were filled we headed back to the craft room to stitch the beanbags closed. Gussy played with the stick pins, which is one of his favorite passtimes. We have a magnetic pin grabber so he likes to take all pins off and “suck” them back up. I stitched the bags closed and we were ready to play our game. 
We are lucky enough to have a very fun wool rug in our living room that is covered with circles. We got points for throwing the beanbags inside the pink circles. The second part of the game we used a circle of leftover yarn from a blanket Mama made. We tossed the beanbags into the yarn circle and then to make things a little bit less challenging we ended up just making a yarn line to throw the beanbags across, this made Gussy’s points skyrocket!   
After our game got a little bit old we ended up using the other beans we’d found for some more crafting with GLUE! Glue is the best!   
We also put a few beans in a baggie with a wet paper towel to watch them sprout and a few days later they are already sprouting! Pretty darn fun bean-filled rainy day for me and my jippy! 
Happy Crafting! 
This is a tiny part of what we call our “art room” and boy is it ever an art room. I feel like one of the luckiest humans on earth to have all that we have, and to be as happy as a lark pretty much constantly, this definitely isn’t something I take for granted. It is however one of our very favorite rooms in our house. I spend a lot of time in here by myself and with my kids.  
They have plenty of crafting goodies to choose from so this is our favorite rainy/cold day space. We decided to put a big closet in here (since we just remodeled recently), but it looks as if we have two separate closets, they are connected (secretly).  
I sew over here…  
This room has amazing windows, so it is bright/sunny year round, which makes for a bit of extra inspiration. My kids have an easel that is set up at all times so we can paint at a second’s notice – and we often do. 
We have a small gallery in one of the corners – and of course art is displayed throughout our entire house as well. I love having my sewing machine out at all times for quick mending, patching or just a spare 1/2 hour during a spontaneous crafting adventure. We always have several projects going on around here. I’m pretty into knitting and most of that I do in a different room where I can curl up in a cozy spot. I love the fact that I can keep things very accessible for whatever project I happen to be in the mood for. 
Scrap fabric is very inspirational! The closet is filled with nearly every art medium one could think of. We have window crayons, colored pencils, paints of all sorts, markers, crayons, glue, scissors, pipe cleaners, feathers, playdough, papers of all sorts, stickers, stencils, stamps, the list goes on and on. We’re art pack rats! 
I challenge you to create an art nook or space for crafting in your home. It doesn’t have to be an entire room by any means…but even a closet or corner of a room will do. Space for art is important these days – especially since there is less and less art in the public school system. I love to keep our options open and always have the supplies and space available for my kids to create whenever they might feel the desire. And, I love love love having the space for myself as well, it has always been a wish of mine, and I’m a lucky lucky Mama to have it in my pretty Montana home. Happy Creating – Happy Crafting! Er at least most of it. 
You can subscribe to read this super fun blog, if you want! I promise to keep it fresh and full of new crafting ideas for you and your families! I just wanted to make sure that my followers knew it was an option to have delivery directly to your email inbox whenever a new post appears. If you tire of me you can always unsubscribe.
I hope everyone is having a fantastic Earth Week. Some of the crafts coming your way – napkin making, embroidery, paper quilting, and of course some other crafty Mamas’ spiffy ideas. So stay tuned. In the meantime, what did you do to celebrate Earth Day? I knitted another dishcloth while teaching myself to increase and decrease – I think I’ve got that tricky business down. And I dug up a tiny corner of our front yard, at our entry, and created and planted a little strawberry bed. We’ll be happy to reap those rewards in probably 3 years when they are actually producing berries. Let’s keep our fingers crossed we can keep them thriving until then. 

Click on the bright green envelope to your left to subscribe (if you want). Happy Earth Week and Happy Crafting! 

The season is upon us, although it is hard to imagine with the bursts of snow and freezing cold winds that keep cropping up around here. My friend Ellen has a new Etsy store with some beaded goodness that everyone ought to mark their gardens with. She’s a talented Mama – she’s been a Mama much longer than I – her baby is a junior in high school! She’s just recently gotten serious about her crafting – and I can’t wait to fill my very first garden, which we plan to plant this year (finally), with beautiful beaded garden tags (and veggies). I’m a big fan of utilitarian crafts. I like to use what I make and of course love to use what my friends make. 
I wanted to help Ellen spread the word about her beaded craft and they are round about the cutest things I’ve seen in a while, so if you have a second to spare you ought to check them out. I’m only showing a few of them here, but I recall seeing a pumpkin, beets, cabbage, corn, lettuce, peas, asparagus, and the list goes on.   
Ooh and I almost forgot to mention that she makes these tasty tag/seed-filled cards to gift as well. 
Happy Crafting! And Happy Gardening! *Soon* 
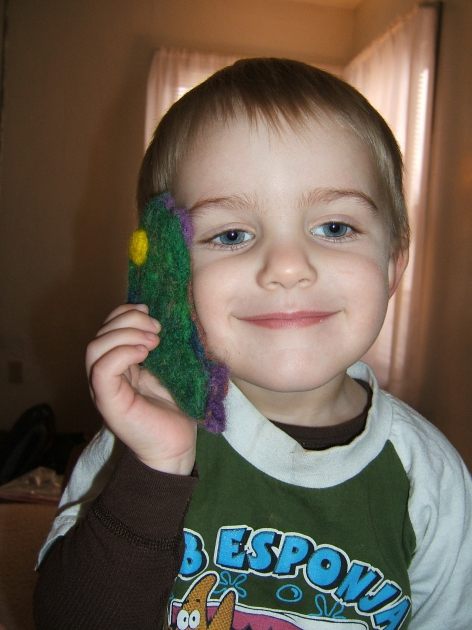
I’m going to start off by saying this was my very first time doing any needle felting with raw wool. I have known for quite some time that I wanted to give it a whirl so I got myself some Fairy Tale Wool a while back and it has been living in my fun craft closet for a few months, inside of the very bag it arrived in. It isn’t much and it is something I order from one of my toy companies, so I figured if I ordered it, it would motivate me to get on the ball learn a new craft. Well I just emptied it this morning to shoot a photo of the pretty colors and I still haven’t used it. But, what I did do is start and finish a few basic felting projects with some other wool I scored on a little day trip we took. We were on our way to Syme’s Hot Springs – where Shane and I got married years ago and we stopped at our favorite little sandwich stop and they had some dusty kits with everything you needed to felt (a fish and a turtle) inside a locked cabinet. I’m not exactly clear as to why they were locked in a cabinet, maybe they never wanted anyone to purchase them, but I got curious enough to request a key. I’m not going to lie, the kits weren’t probably worth what we paid for them, but it got me started.  
Since felting needles are really easy to break, I don’t recommend what they put in the kit as a “must have” for your own raw felting projects. The kits came with a metal cookie cutter in the shape of a turtle and a fish so I rolled with the fish first (maybe it was actually a dolphin). I’m pretty sure it would be incredibly simple to bust your needle on a metal cookie cutter. After I used this metal cookie cutter as a mold I decided I wouldn’t do that again, so I didn’t end up using the turtle, just made my own. Oh and another little mysterious critter. I guess it is a turtle too, sort of. The other thing that came with the kit was a foam pad, it wasn’t anything special, literally just a piece of soft foam. You felt onto this foam and it actually gets kind of ‘stuck’ to the foam so I peeled it away every once in a while. Mind you, I’m no expert – this is just how I did it.  
When felting you use a barbed needle with sharp points all up and down the sides, like hooks. You just press the needle into the felt, up and down, over and over again. It felts the wool together so you can put different colors on top of your main piece – or add design. I have a good friend that is actually, what I consider, an amazing felting artist so these pieces don’t compare to her but they were just for my kids, and they loved them regardless of my skill. Oh and it was a really quick project, it only took about 1/2 hour to make all three critters, for a first timer, not to shabby.   
Next step is to figure out what treasures we will make with this bunch of colorful wool! 
Happy Needle Felting! Happy Crafting! | |


